
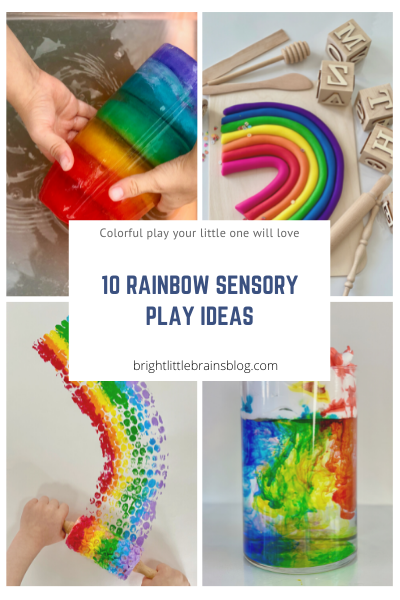
Looking for fun hands-on ways to introduce your little one to the wonderful world of COLORS? Then try these super fun to set up rainbow play activities that are toddler friendly, educational, and easy enough to do at home!
*Disclosure: I only recommend products I would use myself and all opinions expressed here are my own. This post may contain affiliate links that at no additional cost to you, I may earn a small commission.
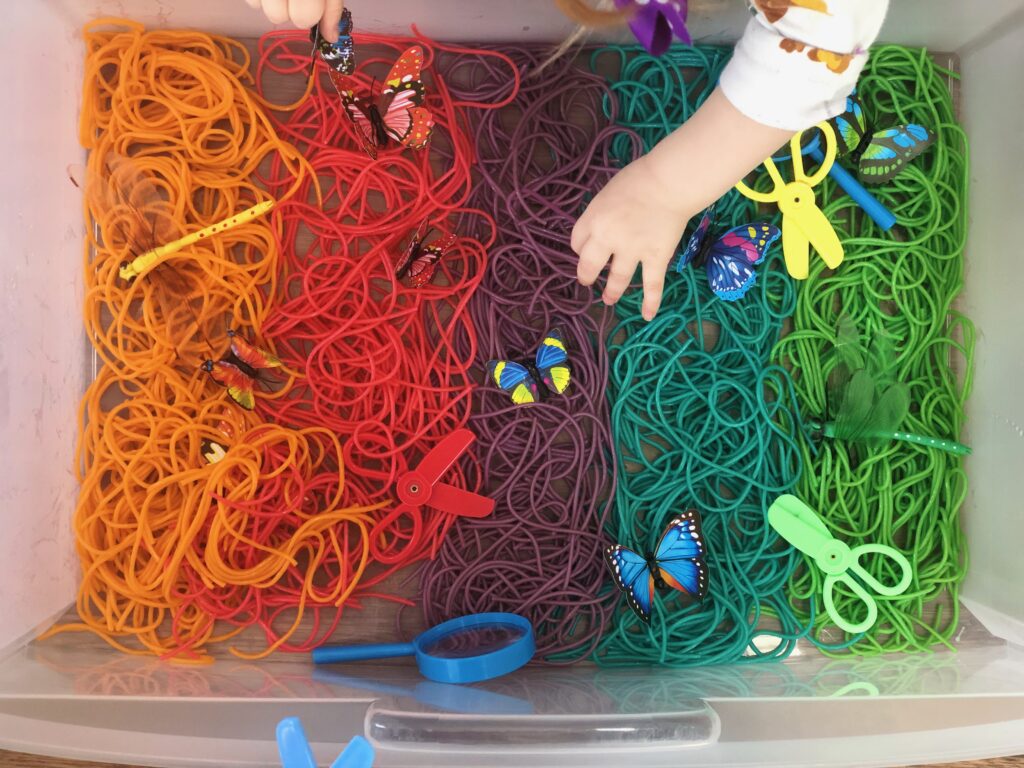
1. RAINBOW SPAGHETTI
Rainbow spaghetti is exactly what the name implies, colored spaghetti! This is really an occasional play but perfect for mouthing toddlers because it’s taste safe.
Here are 2 different ways to dye spaghetti. Both methods work equally well.
Materials needed:
- Spaghetti
- Liquid food coloring
- Boiling water
- Oil
- Stove
- Cooking pot
- Bin
Method 1
Boil a handful spaghetti on the stove in a cooking pot. Drop a few drops of food coloring in the boiling water. Boil the spaghetti until it’s soft and covered in the desired color. Don’t over boil the spaghetti.
Remove from the stove and drain the excess water.
Repeat for additional colors
Method 2
Boil a handful spaghetti until it’s soft. Rinse the excess water and put it in a plastic resealable bag. Drop a few drops of food coloring to the spaghetti. Seal the plastic bag and shake and mix until all the spaghetti is covered in color.
Repeat for additional colors.
When the spaghetti is cool to touch, spread it out in a sensory bin.
For babies: Strip down to diapers and let them sit in the spaghetti bin.
Toddlers: Add sensory tools as well as toddler friendly safe scissors. Cutting spaghetti is a great way to start cutting.
2. FROZEN RAINBOW
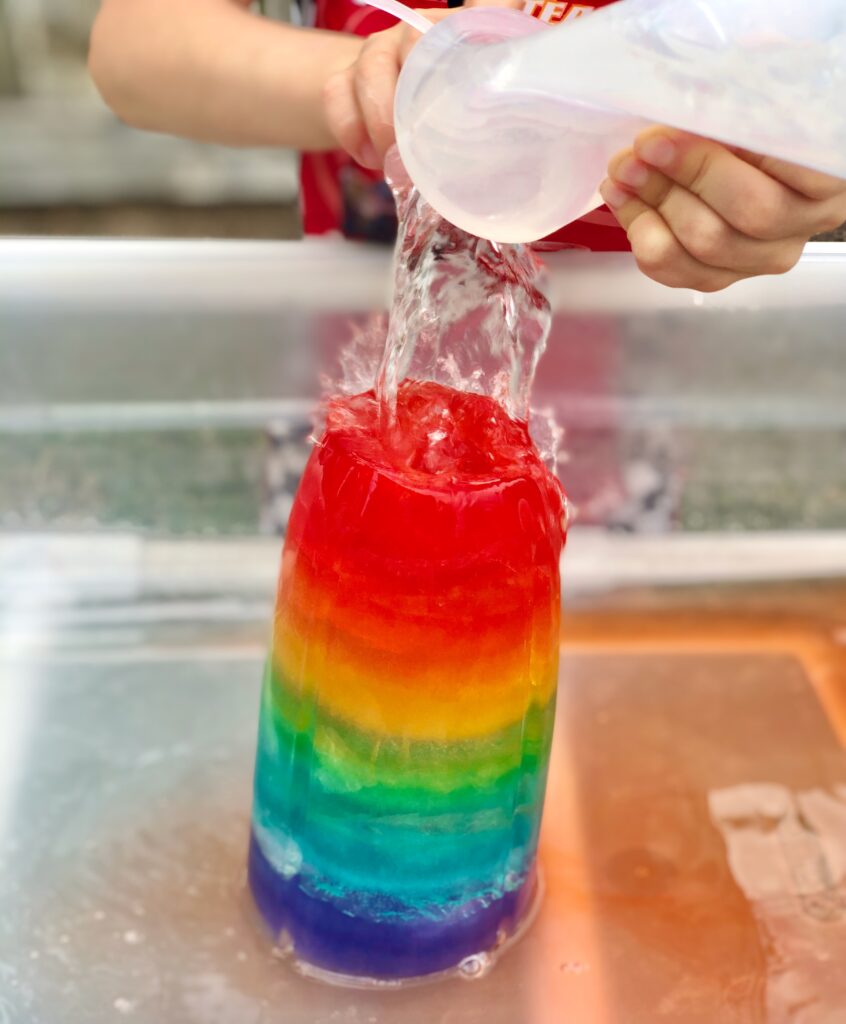
Making a frozen rainbow isn’t difficult, it just takes some patience and time but it’s worth it, especially for those hot summer days.
The kids were mesmerized by all the different colored layers of the ice, and it kept them busy for hours!
Materials needed:
- Transparent container suitable for freezing
- Food coloring
- Water
- Freezer
Method:
- Prepare 1 color at a time by filling a cup with water and a few drops of food coloring.
- Fill the container with the colored water for the first color level.
- Wait at least 8 hours before adding the next color level to ensure the water is frozen solid.
- Continue the steps layer by layer.
- After all the colors are done and frozen, rinse the container under warm water to loosen up.
- Set the colored ice block out with some fun sensory tools for example squeeze bottles and a water bin.
- Let your little ones explore the colors, coldness and try to melt each layer.
- This can easily make an enjoyable bath-time play activity because the warm water will help for an easier melting process.
3. RAINBOW CORN KERNELS
We love the feel of kernels, it’s so smooth and light and makes the most beautiful sensory trays.
Let me explain and start off by saying – to dye kernels aren’t the same as dying rice, it’s a very time consuming process but so worth it!
I obviously started to dye a small amount of kernels by just adding a few drops of food coloring but it didn’t work at all, so after some intense research I took bits and pieces of advice from different pages and it worked!

Materials needed:
- A dye safe container for each color
- ⅔ cups water
- ⅔ cups white vinegar
- 2 tbsp. hand sanitizer
- Food coloring
- Corn kernels
- Colorful bowls or cups
How to dye kernels:
- Mix all the ingredients together in the bowl.
- Add 15 to 20 drops of food coloring.
- Add a cup of kernels per color.
- Make sure all the kernels are covered with the colored mixture.
- Let it stand and do regular checkups to see when the color takes effect. This can take up to 2 days!
- When the kernels are the desired color, drain liquid and let it dry on some kitchen towel.
- Enjoy!
I left the kernels in the color water for almost 2 days!
To dye kernels takes a lot of time, food coloring and patience, but worth it cause now we added another beautiful sensory base filler to our collection!
This play focuses on color recognition by adding colorful bowls, cups and sorting the different kernels in the right color bowl.
4. RAINBOW SALT TRAY

It’s so easy to dye salt! Something I love to do, and I also incorporated into my sensory play kits that you will find in my Etsy store.
How to dye salt:
- Pour a cup of salt in a container or plastic bag.
- Add a few drops of liquid food coloring (the more drops the darker the color).
- Pour out on a tray and let it dry for a couple of minutes.
Adding theme components and different sensory tools will make this activity fun and educational for your little one.
5. RAINBOW RICE
Have you ever made a simple rainbow rice tray before? This is probably the first bin/tray you want to start with when introducing your little one to the wonderful world of sensory play!
I must admit that this is my second ever rainbow rice tray I have setup for the kids. This time I made it a little bit different, instead of using food coloring, I used paint to dye the rice.
The only reason is that I wanted to create different shades of colors and I loved the different tones of the paint I had.

Materials needed:
- Rice
- Paint or food coloring
- Vinegar or hand sanitizer
- Resealable bag or container for mixing
- Baking tray or plate
- Sensory tray or bin
- Sensory play tools
Method:
- Add a cup of rice in a resealable bag or container.
- Add a few drops of food coloring or paint to the rice.
- Add a teaspoon of vinegar or a squirt of hand sanitizer.
- Close, seal and shake-shake-shake until all the rice is covered in the desired color.
- Spread the rice out on a baking tray or plate.
- Wait until dry.
- Prepare the bin or tray by adding one color at a time.
- Add sensory tools to your tray.
If your little one tends to taste/eat sensory play materials, it’s best not to dye rice with paint but rather food coloring. Remember that adult supervision is always required during sensory play time!
6. RAINBOW CLOUD STEM PLAY

This toddler friendly stem play activity is not only educational but so pretty as well. To see all the beautiful colors of the rainbow falling from the shaving cream cloud is so mesmerizing!
Materials needed:
- Vase or mason jar
- Water
- Shaving cream
- Liquid food coloring
- 5 smaller cups/ containers
- Droppers
Method:
- Fill your vase/jar 3/4 with water.
- Add shaving cream at the top of the water to indicate a cloud. I smoothed out the shaving cream a little bit to close some openings.
- Add a small amount of water to 5 smaller cups/containers. Drop 1-2 drops of food coloring in the water and mix. I made the rainbow colors (purple, blue, green, yellow, and red).
- Now it’s time to use the droppers and drop the food coloring according to the colors of the rainbow on the shaving cream cloud.
- Push the dropper in the middle of the shaving cream cloud to release the color. Be careful not to push it too far, it will spurt out a stream of color that will not create raindrops.
- After all the colors are dropped in the shaving cream cloud you can enjoy the colorful rainbow rain!
7. DIY RAINBOW ROLLER

If your little one loves art and craft activities, then this might be one of our favorites.
Materials needed:
- Rolling pin / playdough roller (plastic if you can)
- Ours are from @amazon – link in bio
- Bubble wrap
- Box tape
- Scissors
- Paint (colors of the rainbow)
- Craft paper
- Plate/cardboard
Method:
- Wrap some bubble wrap around a rolling pin.
- Secure with box tape.
- Squirt some paint on a flat plate/surface in order of the rainbow.
- Tape craft paper to the table making sure that it will not move around.
- Roll the rolling pin in the paint until the whole roller is covered in paint.
- Make some rainbow prints on the craft paper.
- You can repeat it as many times as you like.
8. HOMEMADE RAINBOW PLAYDOUGH
Playdough is a wonderful sensory medium that provides endless hours of fun. It creates a sense of calmness, encourages creativity, and develops so many important developmental skills.
To squish, roll, smash, push, pull, twist and cut are just a few actions children make use of to develop hand muscles when playing with playdough.
Ingredients:
- 1 cup flour
- ½ cup salt
- 2 tablespoons cream of tartar
- 1 cup boiling water
- 2 tablespoons oil
- Food coloring
- Essential oils (optional)
Method:
- Mix all the dry ingredients in a mixing bowl.
- Add the oil and food coloring to the boiling water and pour in the dry ingredient bowl.
- Mix it all together.
Add some wooden playdough tools for extra fun!
9. WALKING RAINBOW STEM PLAY
This toddler friendly experiment is something to try and it’s also a great activity to explain the process of capillary action to your little one.
What is capillary action?
It’s the spontaneous flow of liquid into a tube or porous material. It can be explained that this phenomenon is the same for plants and trees how they get water from the grounds with their roots.

Materials needed:
- 6 small clear cups
- Water
- Kitchen paper towels
- Food coloring (liquid food coloring works best)
Method:
- Fill 3 cups with water – Fill the water to almost the top. The more water the faster it will travel.
- Add 1-2 drops of RED food coloring to a cup, 1-2 drops of BLUE food coloring to a cup and lastly 1-2 drops of YELLOW food coloring to a cup.
- Place the cups in a circle order: red, empty cup, yellow, empty cup, blue, empty cup.
- Cut small pieces of paper towel (make sure it’s not too long) and place it in the cups by folding it over in an empty cup.
- The water and dye will start to move up the paper towel and secondary colors will form in the empty cups.
- After a while you’ll will see the whole rainbow formed.
10. DIY RAINBOW ZIPPER BOARD
I wanted to create a zipper board for so long now and finally managed to make one a few days ago. You will usually find zippers as part of a busy book, but it’s so much fun and super easy to create one yourself!

Materials needed:
- Piece of cardboard
- Different color zippers
- Glue gun
- Felt (I used white felt for the clouds but this is optional)
- hook-and-loop fastener dots
It’s as easy as using a glue gun and sticking the zippers to the board. Just make sure that you only add glue to the sides of the zipper.
I also added hook-and-loop sticky clouds for Lana to sticking and removing it.
This activity board is fun, hands-on and engaging and a great way for little ones to practices fine motor skills, concentration, focus and problem solving skills.
