
Have you ever given your child just a normal, no fancy at all cardboard box to play with? If you have, you will agree that it was one of the best toys your little one probably played with.
When we relocated from South Africa to the States, this was one item we had plenty of that just happened to entertain my kids while we were unpacking. If the kids didn’t play hide-and-seek, they imagined that it was a tiny house, then a boat, a tunnel, and even a tent!
So, I am forever grateful for a simple old box!
Seeing that we had a lot of cardboard just piling up in the garage, I knew I had to turn it into something useful for the kids to play with. I realized that the best toys are for sure those that are homemade. When I started searching for some ideas, my mind was blown away by all the creative and fantastic cardboard creations you can make.
I know that creating an educational resource for your little one can mean that it will only last for either a couple of minutes or a couple of months. But knowing that it is so commonly available, cheap, and a great way to get rid of some of the piled-up cardboard had my hands itchy to start!
Before I list my top 5 cardboard creations, I must testify that having a suitable utility knife/cardboard cutter is a must! It makes life a lot easier and will spare you so much time!
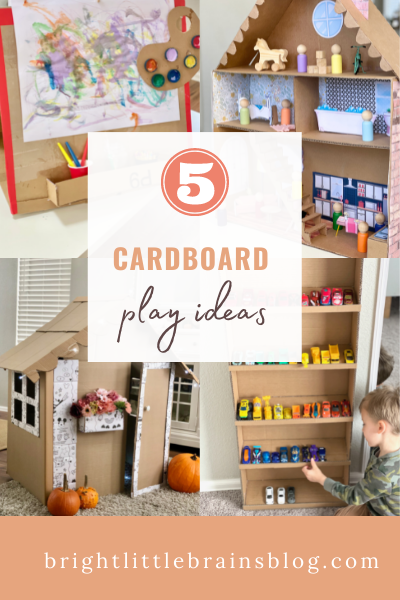
Listed are my best 5 cardboard creations for great play ideas for kids!
*Disclosure: I only recommend products I would use myself and all opinions expressed here are my own. This post may contain affiliate links that I may earn a small commission at no additional cost to you.
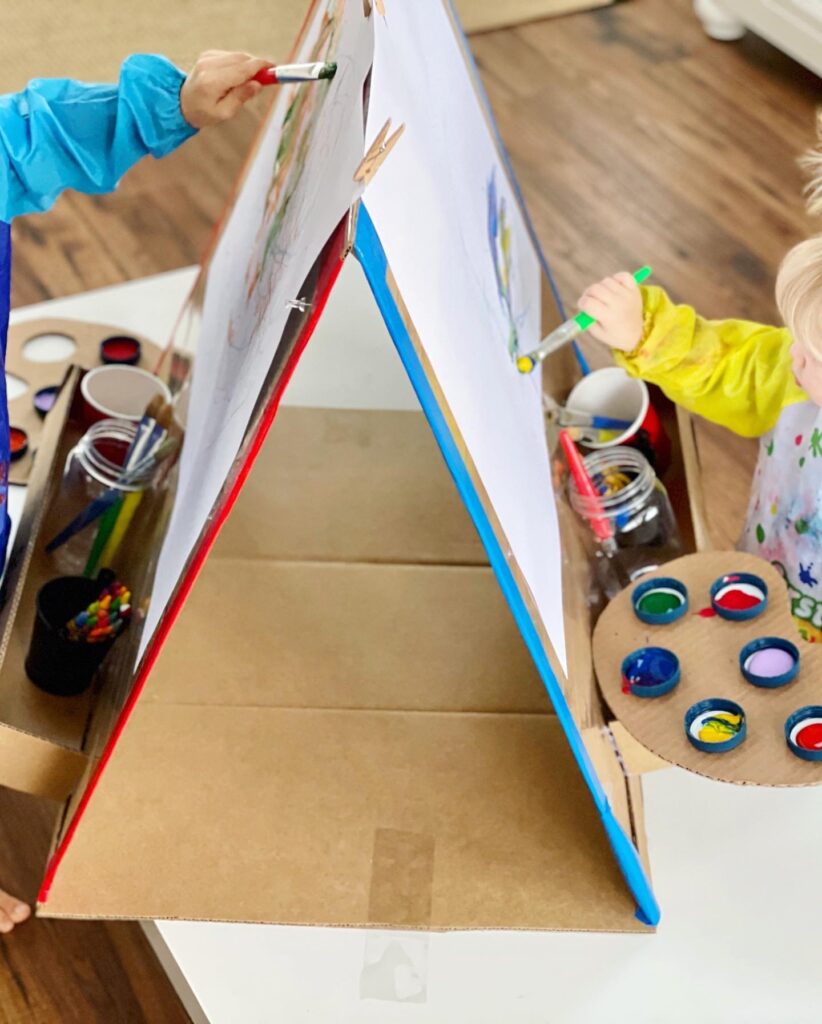
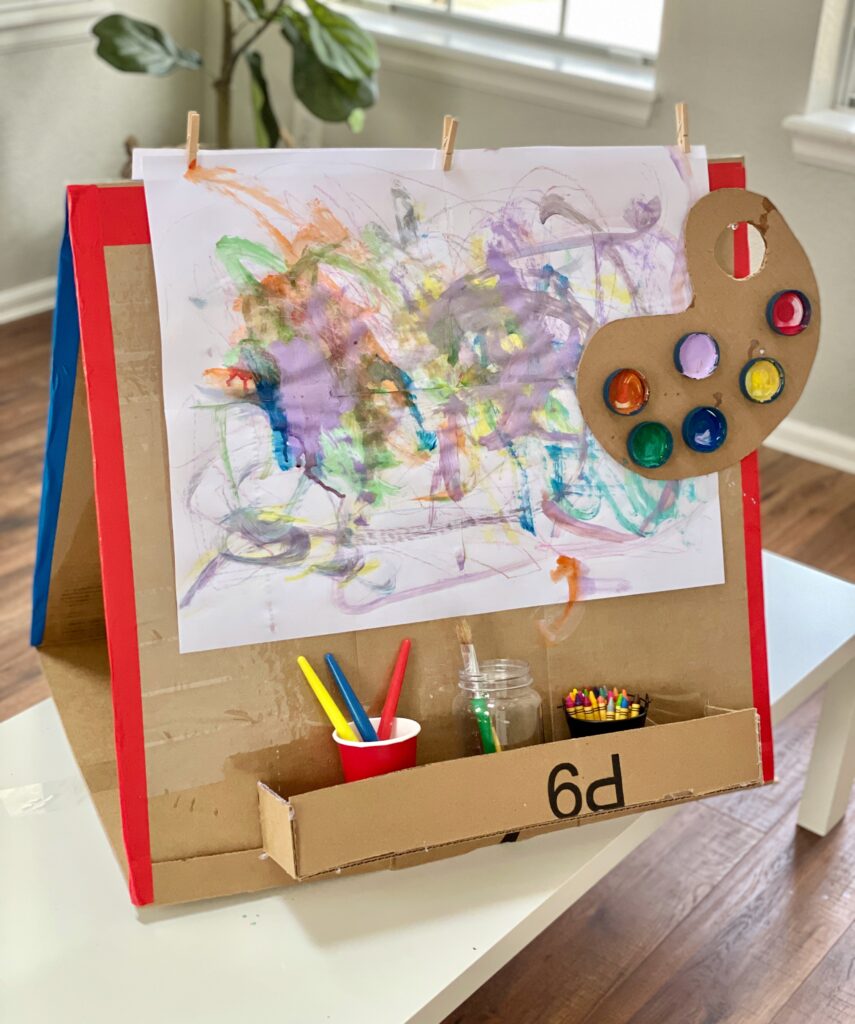
1. Art Easel
I created an easel for the kids to let them work on a vertical surface. Introducing your little one to more vertical surface activities is so important.
Here’s why:
It strengthens and develops muscles of the upper extremities, develops midline crossing, is great for bilateral coordination, and focuses on core strength and posture. It also creates spatial awareness and develops proper hand-eye coordination.
Materials used for the easel:
- A large Cardboard box
- Cardboard cutter/utility knife
- Glue gun
- Box tape
- Clothespins to hold the white craft paper
- Colored Painter’s tape to give the easel a finished look.
Instructions:
- Cut the box on both sides to have 2 flaps that are still secure at the top.
- This part is optional: Cover the whole easel with clear box tape!
- This will make it easier to clean, can repeatedly be used, and look spotless. There is no need for paper because you can paint and draw with non-permanent markers on the tape and can be removed using a cloth or wet wipe!
- Fold the flaps so that it can stand like a triangle.
- Add a piece of cardboard as a base at the bottom of the two flaps. Fold a piece of cardboard over each flap so that it holds the cardboard.
- Secure the base cardboard to the side flaps with box tape.
- Add a supplies tray at the front side of each side by cutting some cardboard and securing it with a glue gun.
- Finish the easel with colorful painter’s tape by trimming the edges.
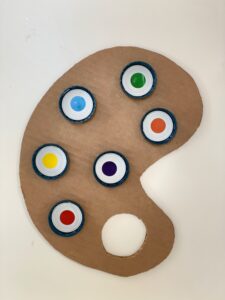
Materials used to create the palette:
- Cardboard
- Cardboard cutter/utility knife
- Bottle caps
- Colorful dot stickers
- Paint
Instructions:
- Cut a piece of cardboard in the shape of a palette.
- Add bottle caps to the palette with a glue gun.
- You can add color dot stickers to indicate each color.

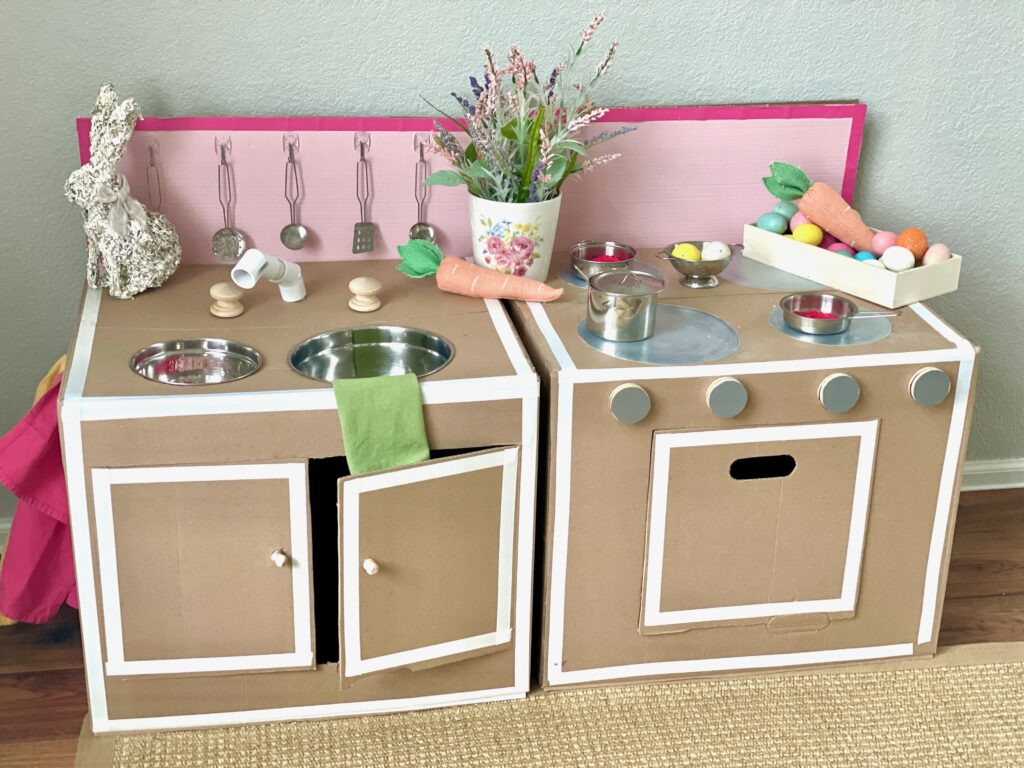
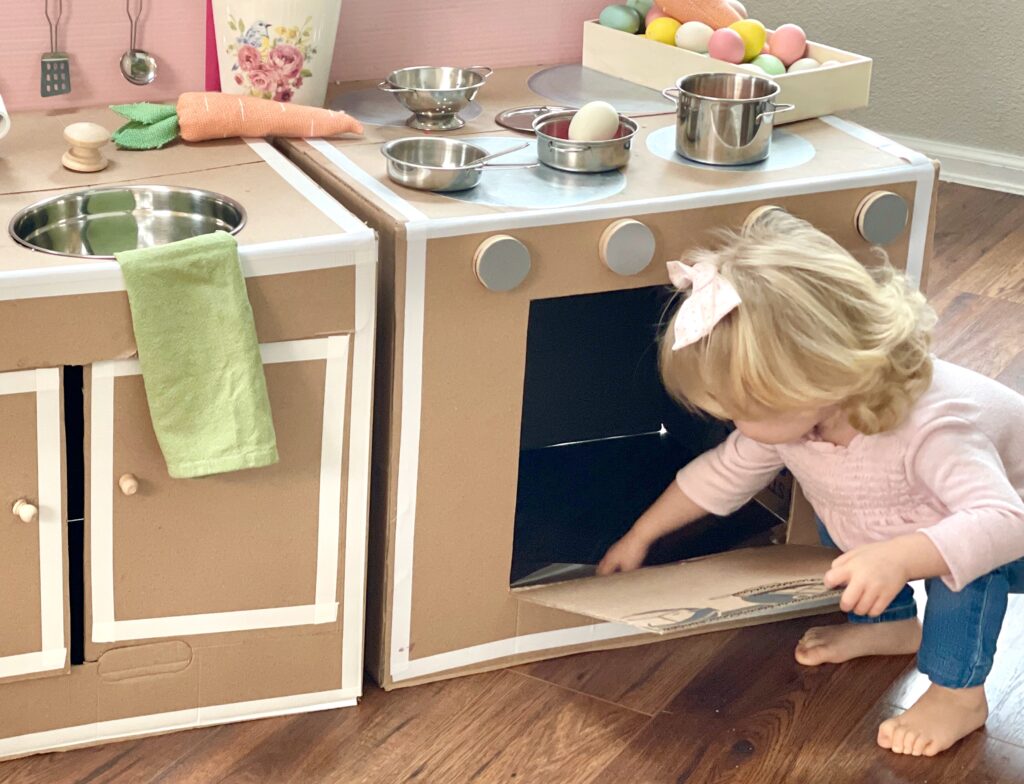
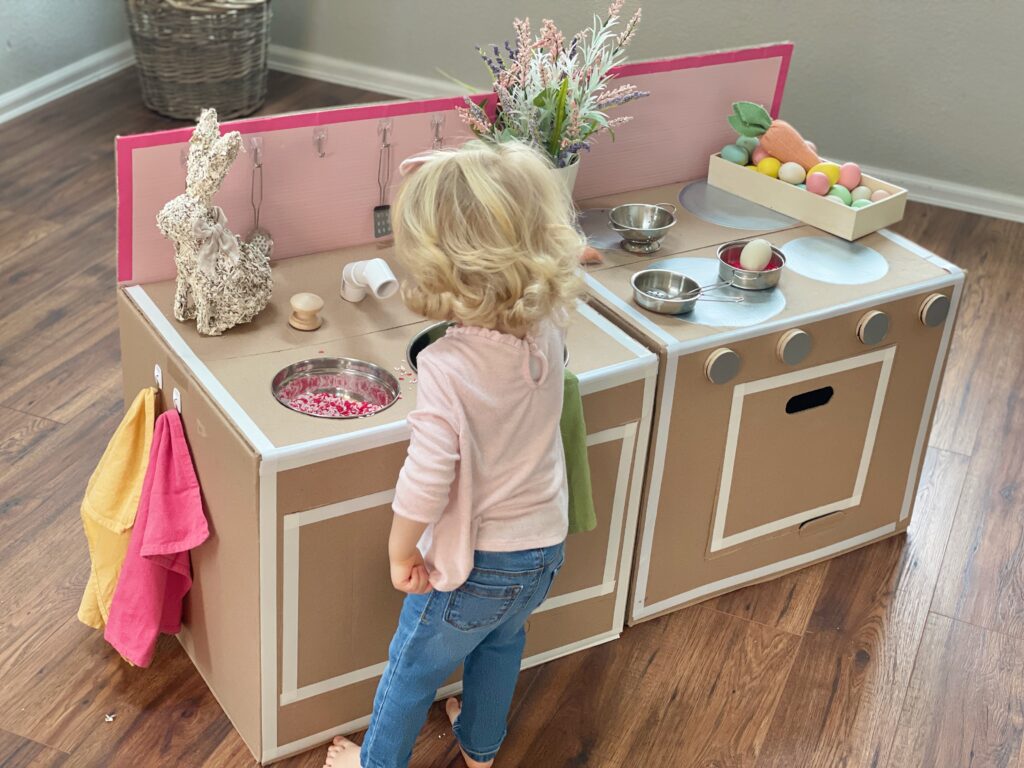
2. Cardboard Kitchen
This kitchen might look like a ton of work, but I can honestly say that it wasn’t.
When I saw 2 beautiful cardboard boxes on our cardboard pile, I immediately knew that I could create a DIY kitchen for the playroom!
To my surprise, it lasted a couple of months, and the kids loved to pretend to play at the cardboard kitchen every day.
Materials used:
- 2 large boxes
- 1 smaller box
- Cardboard cutter/utility knife
- Paint
- Painter’s tape
- Hooks
- Mini Kitchen utensils
- Bowls
- Box tape
- PVC pipes as tap area
- Free printable (stovetops/dials)
Instructions:
- Prepare the boxes. If your boxes have writing on them, turn them inside out! I used my cardboard cutter to cut one side open, then turned them inside out and secured it with box tape on the inside.
- Cut the smaller box in backsplash strips.
- You can paint or spray the boxes, but I preferred the natural cardboard look.
- Cut holes where you want a sink area to be.
- Add a stovetop area by either making use of free printable pictures or metallic silver spray or paint.
- Use PVC pipes to create a tap area.
- Add some hooks to hang kitchen utensils and kitchen towels.
- Cover the edges of the boxes with colored tape to give the kitchen a finished look.
- Add fun accessories to the kitchen for optimal playtime.
3. Cardboard Car Storage
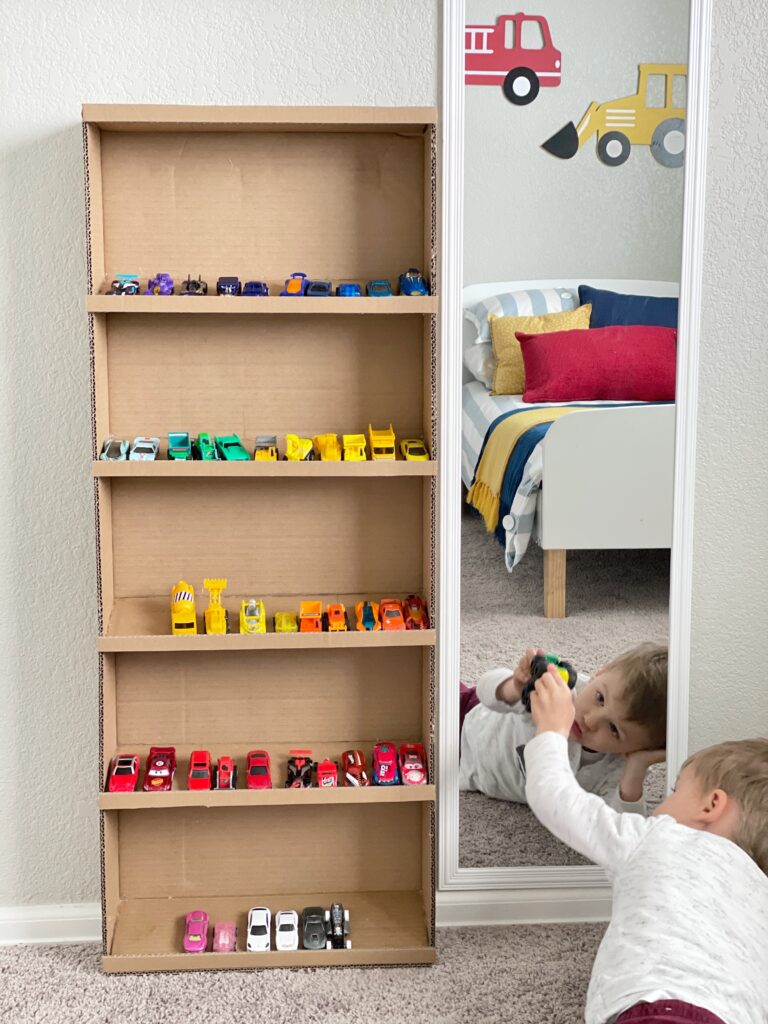
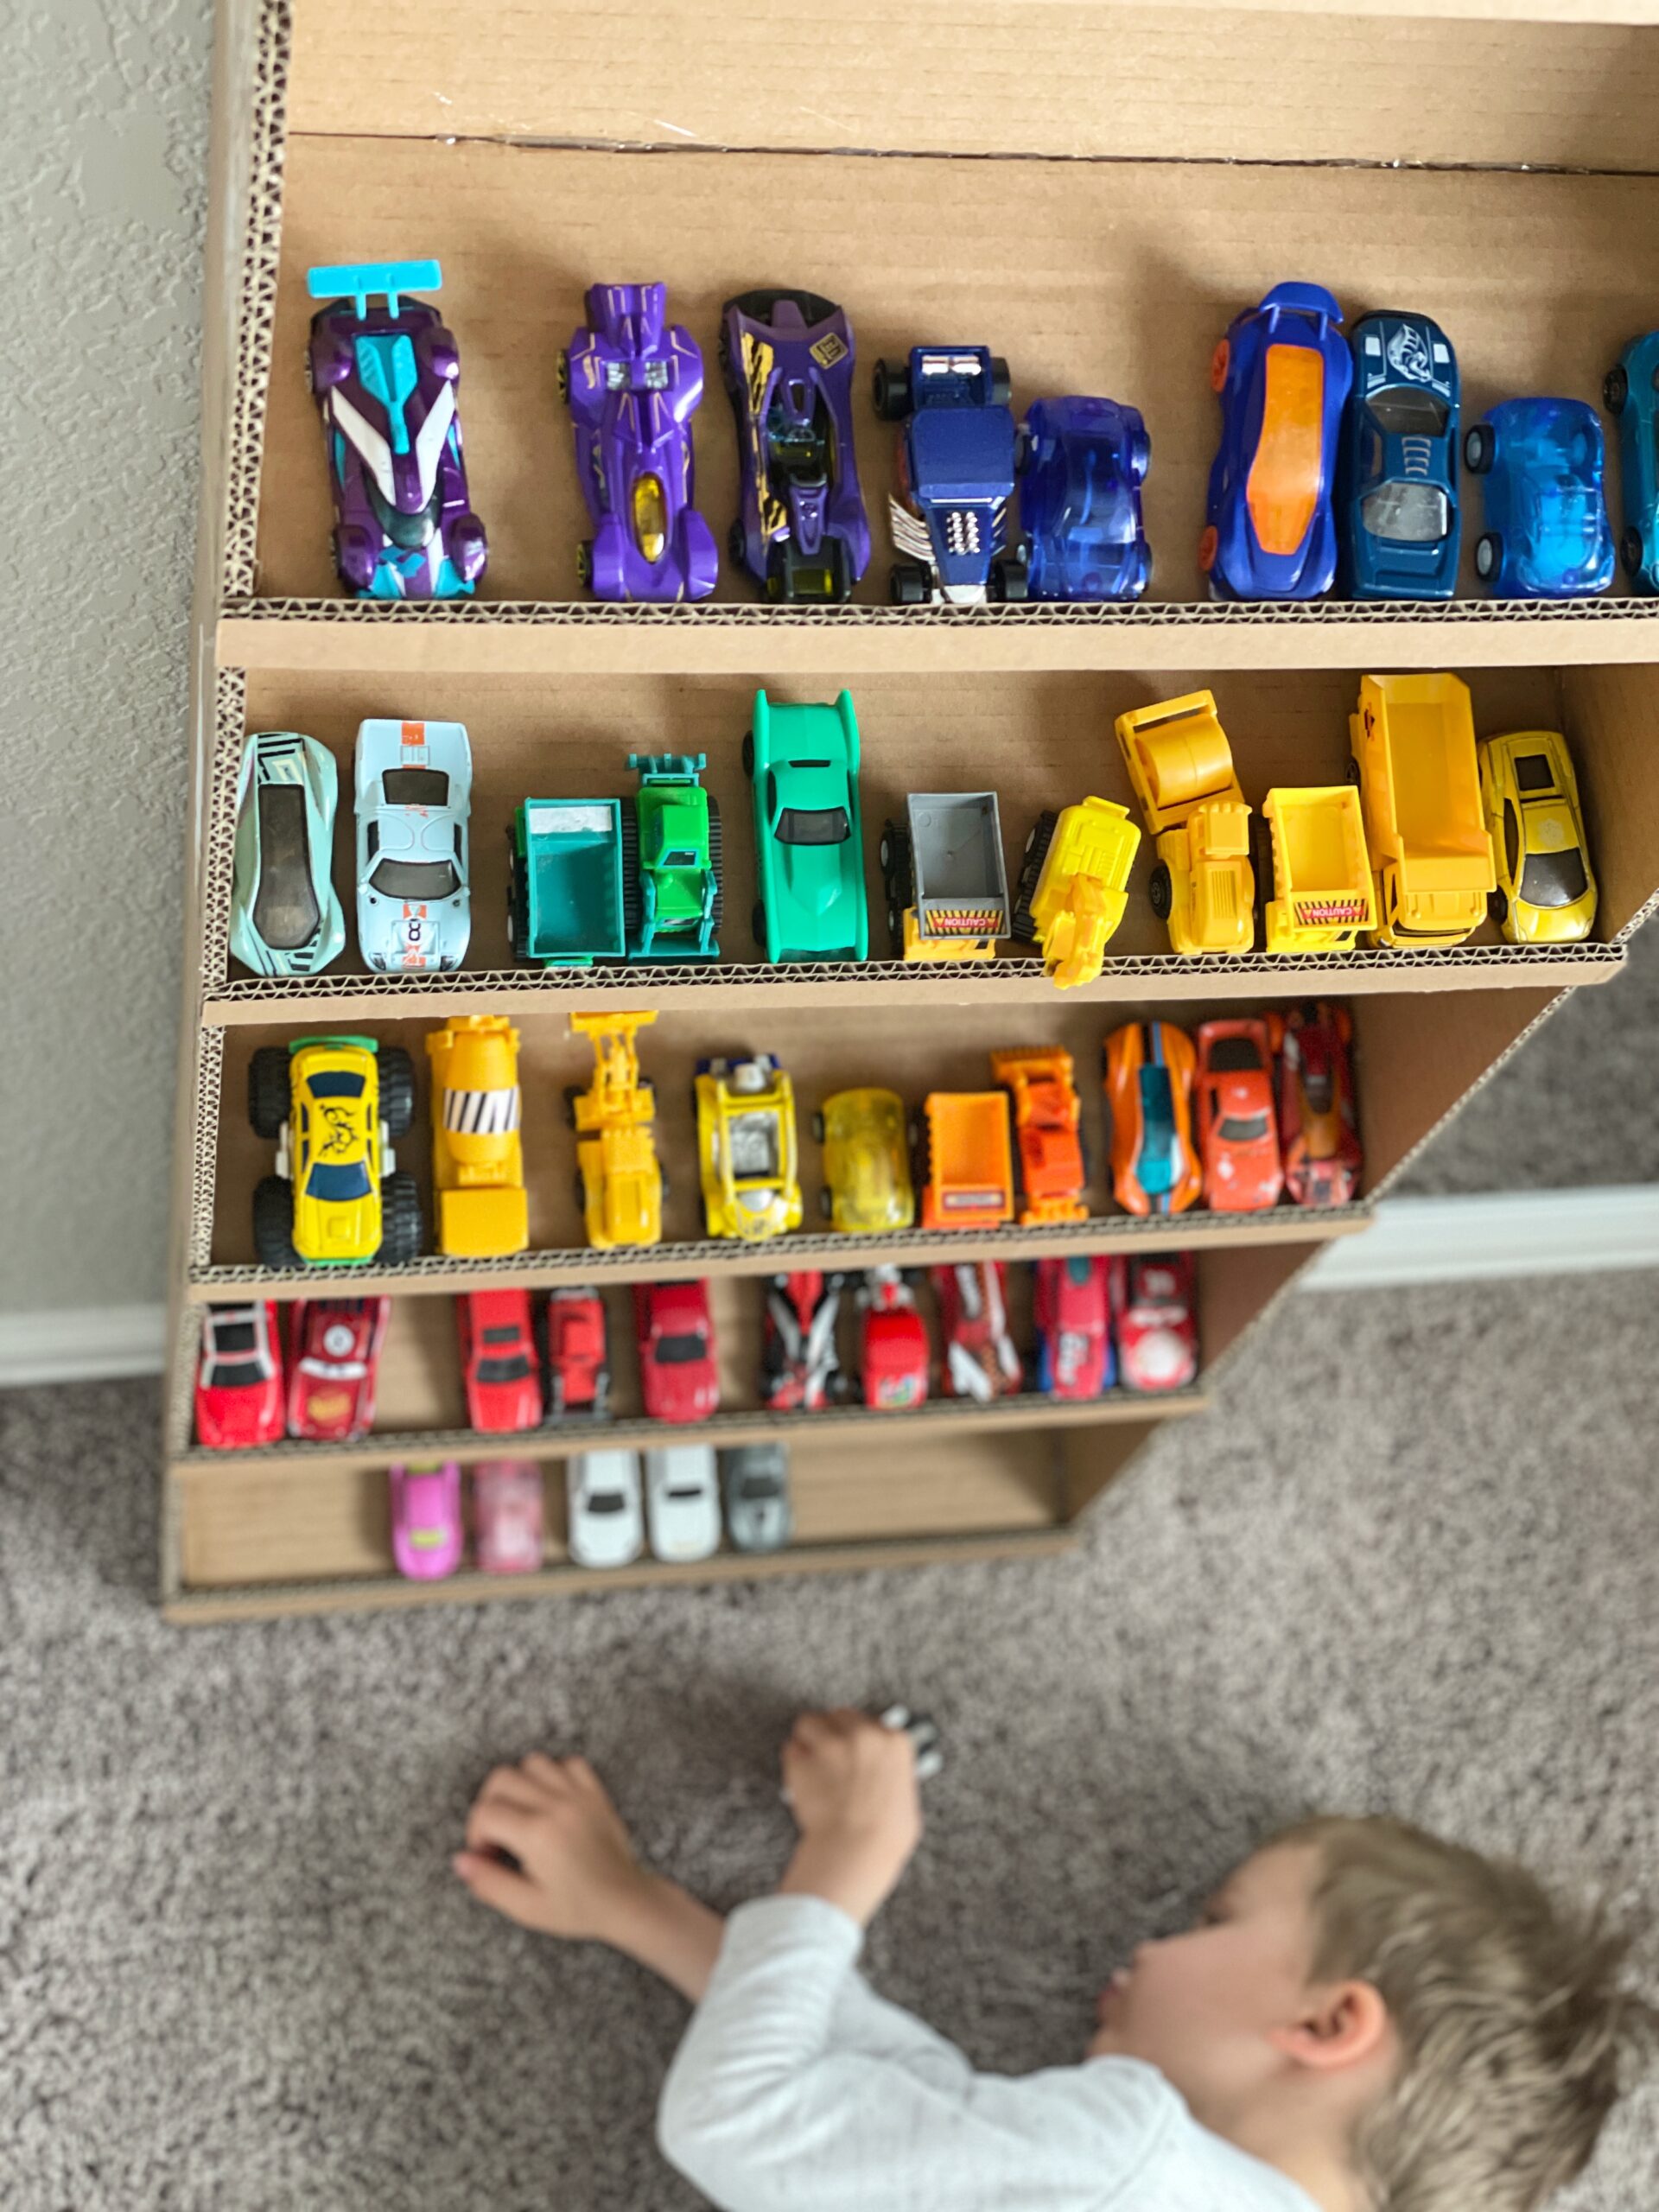
Now here is an excellent solution to your little one’s cars lying around!
I must admit I visited many websites searching for an affordable toy car storage unit, and I couldn’t find anything I had in mind. Suddenly it came to me that I can create one ourselves from cardboard. I also didn’t think that it will last very long.
The Cardboard storage is still going strong for almost ten months now! I had to glue 1 or 2 parts that came loose just once in 10 months. So, I must admit that using strong cardboard is the way to go!
It’s so easy to make, and with the help of my husband and dad, the request was completed in the nick of time!
Materials used:
- Cardboard
- Glue gun
- Cardboard cutter/utility knife
Making the car storage is as easy as it looks!
- Decide on the area you want to put the storge.
- Measure the area and decide how tall, wide and deep you want it to be.
- The size of the car display depends on how many cars your little one has, and you can add more shelves as well!
- Cut the backside of the storage and glue strips to create a frame.
- Add shelves using a glue gun but glue them with a slight elevation. This elevation will ensure that the cars are better displayed.
- Add a cardboard strip in the front of each shelf to prevent the cars from sliding off.
4. Cardboard Dollhouse
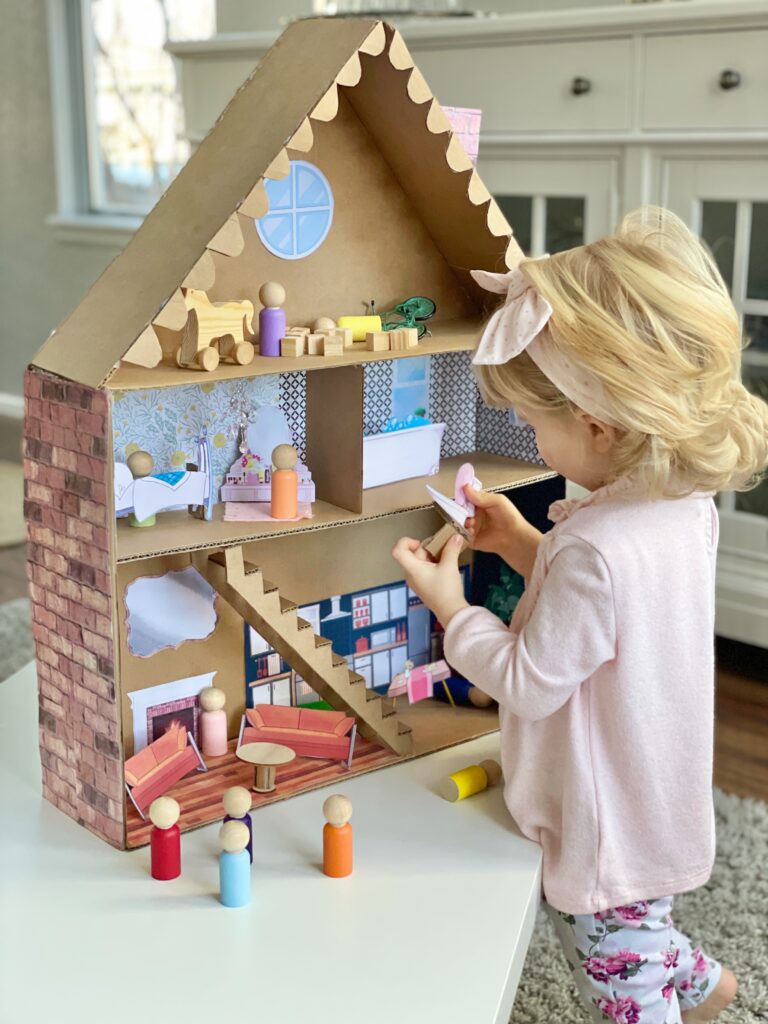
The idea of creating a cardboard dollhouse came from us wanting to buy Lana a real dollhouse for her second birthday. We were afraid that a dollhouse would not be suitable for her age.
I decided to test the waters, make her a cardboard dollhouse, and see how often she uses it.
Materials used:
- Cardboard
- Cardboard cutter/utility knife
- Glue gun
- Floral wallpaper (Free printables from @treehousethreadsblog)
- Dollhouse furniture
- Accessories
- Peg dolls
Instructions:
- Plan the size and look by outlining the dollhouse on the cardboard.
- Cut the framework and other parts of the dollhouse with a cardboard cutter.
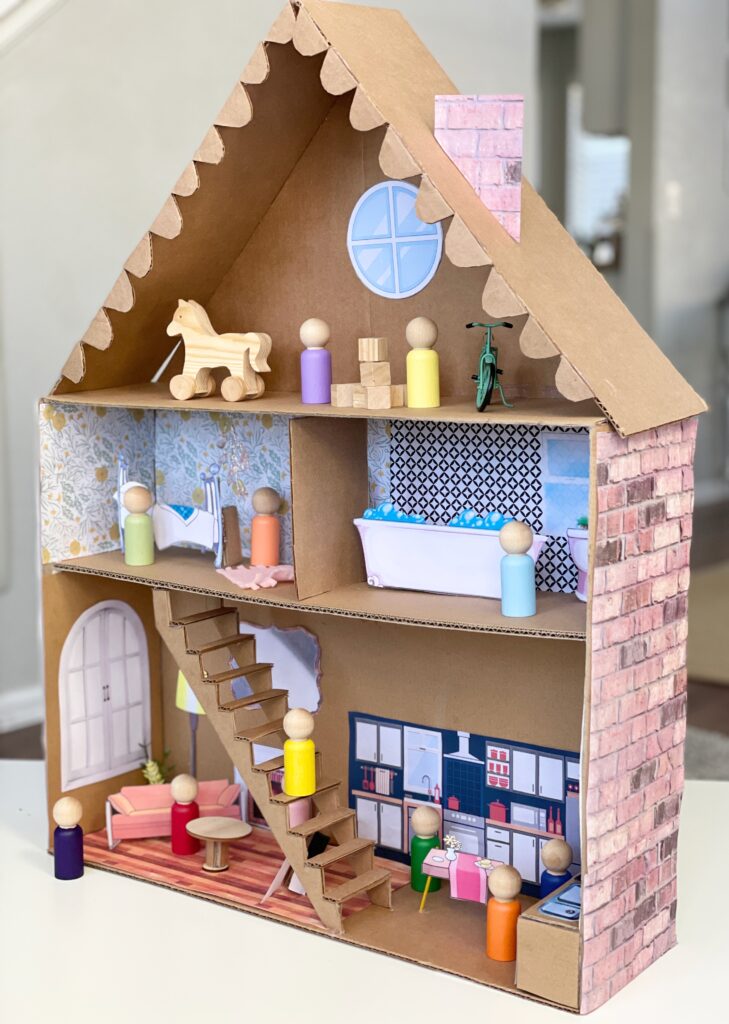
- Our dollhouse consists of a framework, a roof, the sides of the house, different levels, a staircase, and the leftover cardboard was used to create some furniture.
- Glue all the pieces together using a hot glue gun
- When the whole framework of the dollhouse is complete, it’s time to add the details and accessories:
I used lots of different free printable to create a finished look. I made use of floral wallpaper for the walls, bricks for the outside walls. I also used free printable pictures to showcase the kitchen, bathroom, and rooms, images of carpets, windows, mirrors, and lights. - I added wooden peg dolls for role-playing.
5. Cardboard Playhouse
The idea of creating a cardboard playhouse came after we were snowed in for a couple of days. We had lots of time on our hands, so I knew this project takes more time and effort, and everyone will be able to help!
Seeing that it will be a monumental task, I planned it out. I gave some responsibility to the kids to get them involved in the whole process, from searching for boxes, picking up the little pieces, cleaning, watching, or holding a part.
Materials used:
- Large boxes (I used different textured cardboard)
- Cardboard cutter/utility knife
- Glue gun
- Glue sticks – lots and lots of glue sticks
- Box tape
- Accessories (Fairy lights were a massive hit)
Instructions:
- Use the large boxes as the base of the house. Before combining it, decide how big you want the place to be. Add more boxes if more significant.
- Draw the outlines of the windows with a pencil and cut them open with a cardboard cutter.
- Once all the windows and doors are cut, it’s time to put the base together.
- To put it together, cut each box you are using open and then combine it with a glue gun and box tape.
- If the base of the house is steady, it’s time to add a roof.
- Cut a large box open on one side and fold it like a triangle over the house.
- Secure the roof on the house using a glue gun and box tape.
- Add detail on the roof if you want.
- Decorate with fun accessories.
- The fairy lights were a massive hit with the kids.
- They bond together in this little house by reading books, eating, and enjoying the imaginary play.
